
How to Automate Social Media Image Generation with Airtable
 By APITemplate.io
Airtable is where a lot of teams already keep their content calendar. Here is how to turn those rows into finished, on-brand social media images automatically — and what changed now that the native integration has been retired.
TL;DR:
What This Blog Covers:
How to generate branded social media images in bulk from an Airtable base — the current, supported way — plus a record of how the retired native Airtable integration worked, for anyone who built on it.
Key Points:
- APITemplate.io’s native Airtable integration has been retired; connect the two through Zapier or Make.com instead
- Airtable is a good source of truth for image generation because a base is already a structured content calendar
- One reusable template plus one column of text is all a bulk workflow needs
- Zapier suits simple row-by-row automation; Make.com suits scheduled batches and branching
- Name your template’s visual elements deliberately — those names become your Airtable field mapping
- The same base can drive Instagram posts, banners, QR passes and PDF documents from one set of records
Best For:
Marketing and operations teams who already run a content calendar, product catalogue or event list in Airtable and want images generated from it without manual design work.

Important: the native Airtable integration has been retired
Before anything else, the thing you came here to find out.
The native integration between APITemplate.io and Airtable is no longer available. The Data Integration tab described in older versions of this guide has been removed from the product.
That does not mean Airtable and APITemplate.io no longer work together — they do, and arguably better than before. The connection now runs through Zapier or Make.com, which connect APITemplate.io to Airtable and thousands of other apps in the same no-code workflow. You get the same result, with more control over when it runs and what happens to the finished image.

The rest of this guide covers the supported approach first, then — for reference and for anyone migrating an old workflow — how the native integration used to work.
Why Airtable is a good source for generated images
Airtable is an easy-to-use online spreadsheet-database. The interface is familiar to anyone who has used a spreadsheet, but underneath it behaves like a real database: typed fields, linked records, views and filters. You can use it to organise a product catalogue, a project plan, a sales pipeline or an editorial calendar, and you do not need SQL or any scripting language to do it.
That makes it a natural input for image generation. Most teams that want a hundred social images already have a hundred rows describing them somewhere. The image is not new information — it is a rendering of information you already hold.
A typical base for this has a handful of columns:
| Field | Purpose |
|---|---|
Quote or Headline |
The text that goes on the image |
Author or Product |
A secondary line |
Image URL |
A background or product photo, if the design uses one |
Status |
So you can filter to rows that are ready |
Generated URL |
Where the finished image link gets written back |
That last column matters more than it looks. Writing the result back into Airtable is what turns the base from a to-do list into a record of what was actually produced.
Step 1: Build a reusable template
Everything starts with the design, and the design happens exactly once.
In the visual template editor, create the image you want — the layout, typography, brand colours and logo placement — and leave placeholder content in the fields that will change per row.
Then name the dynamic elements properly. The text element that will receive your Airtable Quote column should be called something like text_quote, not Text 3. Those names become the keys you map Airtable fields onto, and they are the difference between a workflow your colleagues can maintain and one only you understand.
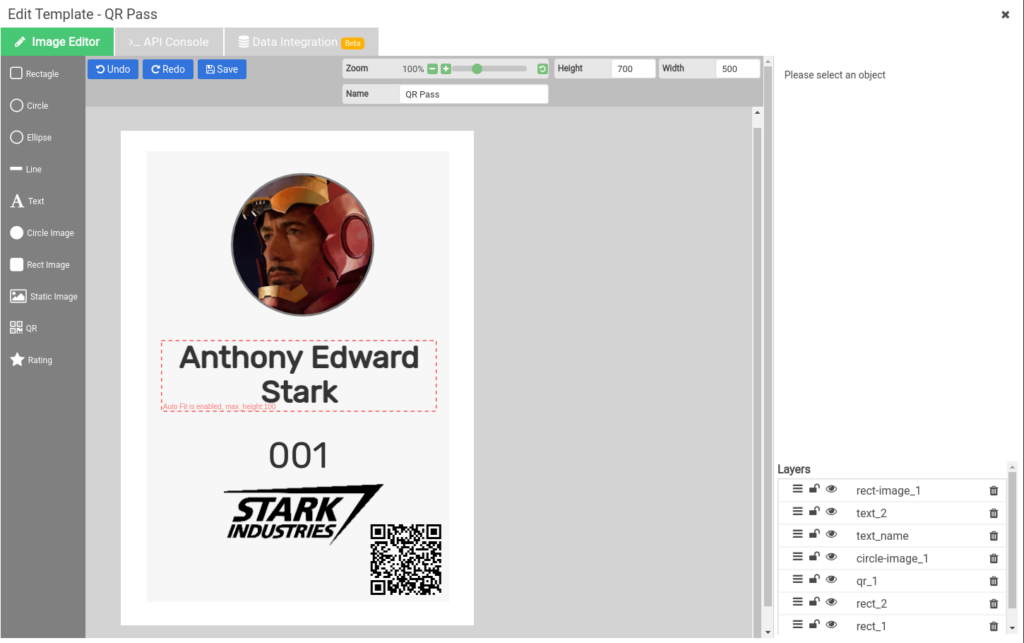
If you are building your first template, our step-by-step guide to creating image quotes from reusable templates walks through the editor in detail.
Step 2: Connect Airtable to APITemplate.io
Pick whichever platform suits the volume and the shape of your workflow.
Option A — Zapier
Best for row-by-row automation: someone marks a record as ready, and an image appears.
- Trigger: Airtable — New Record or New or Updated Record, pointed at a view filtered to the rows you want
- Action: APITemplate.io — Create Image, selecting your template
- Overrides: map each Airtable field onto a template property using the
[element name].[property]format, sotext_quote.textreceives yourQuotecolumn - Action: Airtable — Update Record, writing the returned image URL back into
Generated URL
Our full Zapier walkthrough covers the APITemplate.io action step by step, including where to find your API key and how the override format works.
Option B — Make.com
Best for scheduled batches, branching and anything with more than a couple of steps.
- Airtable — Search Records, filtered to rows ready for generation
- Iterator, so each record flows through the rest of the scenario
- APITemplate.io — Create an Image, with the fields mapped as overrides
- Airtable — Update a Record, storing the image URL
Make.com handles a hundred rows on a schedule far more comfortably than a per-record trigger. See scheduling and automating social content generation with Make.com for a worked example.
Option C — call the API directly
If you would rather not use an automation platform, read the base with Airtable’s own API and post to the image generation API from your own code. It is one HTTP request per image, and the REST API reference documents the payload.
Step 3: Do something with the finished images
Generating the image is rarely the end of the job. Useful next steps in the same workflow:
- Post it directly to your social channels, or queue it in Buffer or Hootsuite
- Attach it back to the Airtable record so the calendar shows what was made
- Drop it into a Slack channel for approval before anything goes out
- Archive it to Google Drive, Dropbox or your own storage — Bring Your Own Storage is available on enterprise plans
Tips for bulk generation
- Filter with a view, not a formula in your automation. An Airtable view called “Ready to generate” is visible to your whole team; a filter buried in a Zap is not.
- Write the result back. Without a
Generated URLcolumn you have no way to tell which rows have been processed, and re-runs duplicate work. - Design for your longest text. The row with a 200-character headline will find every weakness in your template. Our guide to responsive templates using auto-position covers handling variable text properly.
- Watch your plan limits. A base with 2,000 rows is 2,000 images. Check pricing before running a full sync.
- Test on five rows first. Always.
For reference: how the retired native integration worked
This section is kept for anyone migrating an existing workflow or searching for the old behaviour. The Data Integration tab described below no longer exists — use Zapier or Make.com as described above.
The native integration connected APITemplate.io directly to an Airtable base and generated images from its rows, without a third-party automation platform in between.
Connecting the base
Inside the template editor there was a Data Integration tab, where you entered an Airtable API key, an API base and a table name, then pressed Refresh/Connect.
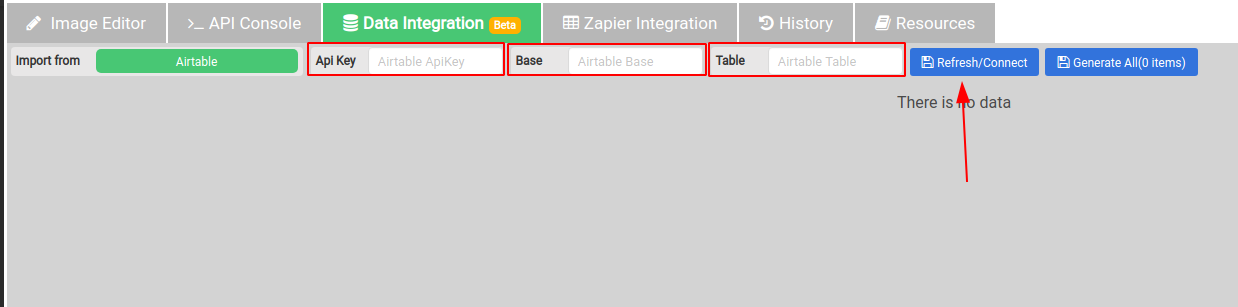
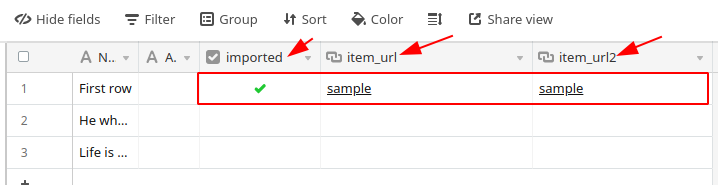
Because Airtable does not expose a table’s schema, the integration inferred the columns from the first row — which meant the first row could not be empty. Every field, including imported, item_url and item_url2, had to contain a value.
Binding fields to the design
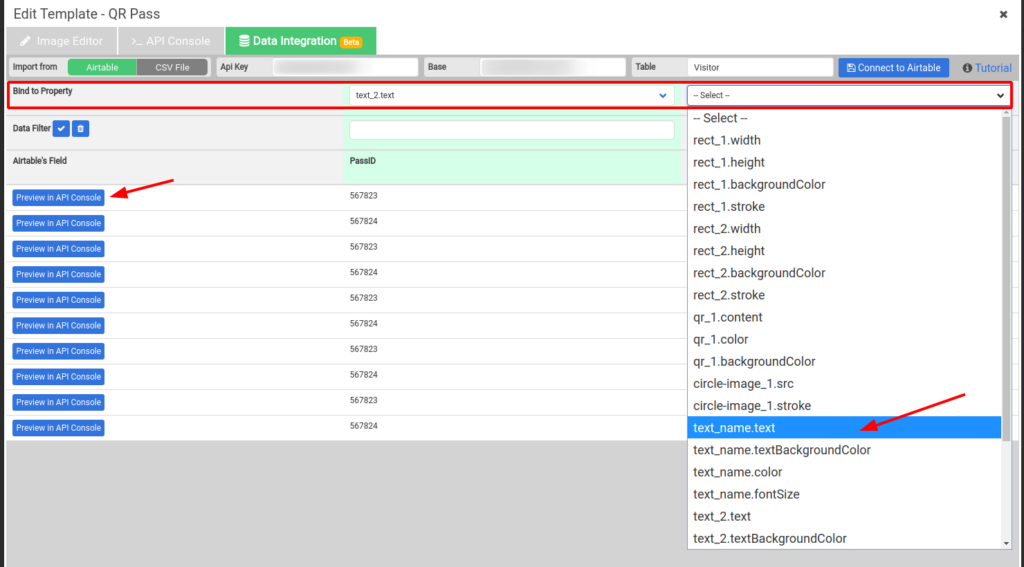
Under the Bind to Property header, each visual element’s properties were bound to a column in the base — in the original example, Name and PassID were bound to their matching fields. Pressing Preview in the API Console rendered a row.
Previewing and generating
A Data navigation bar let you step through records with Previous and Next, previewing each generated image, with Download Image saving the current one.
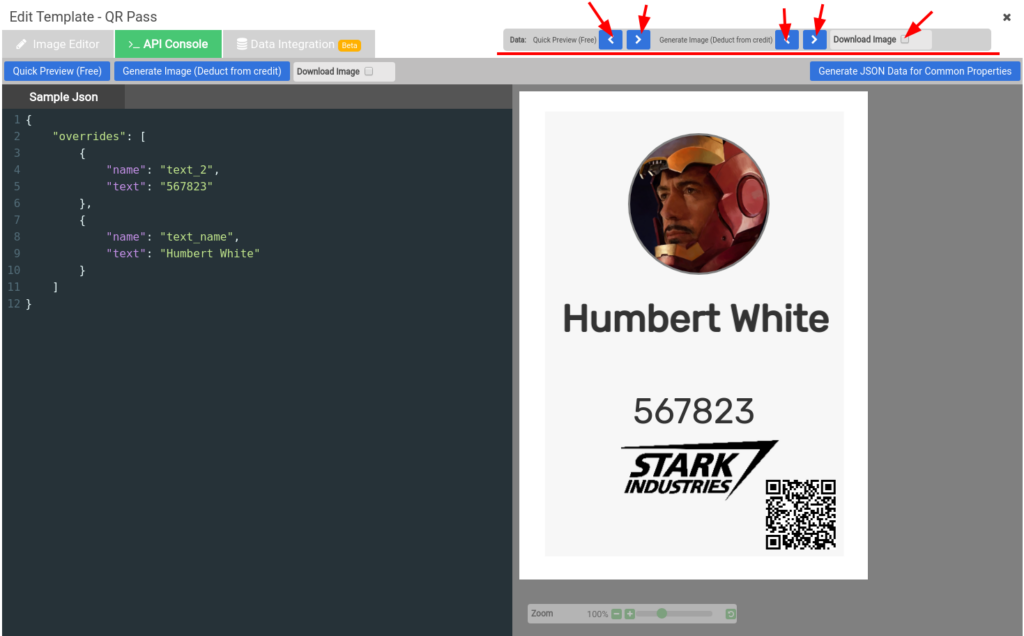
Generate All ran the whole table.

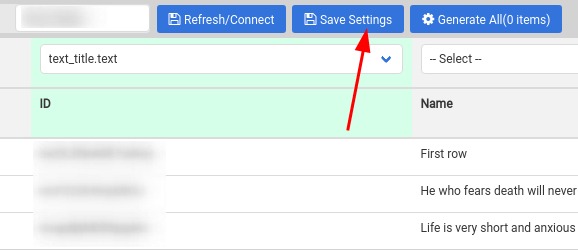
Save Settings stored the Airtable configuration against the template.
Where the Airtable credentials came from
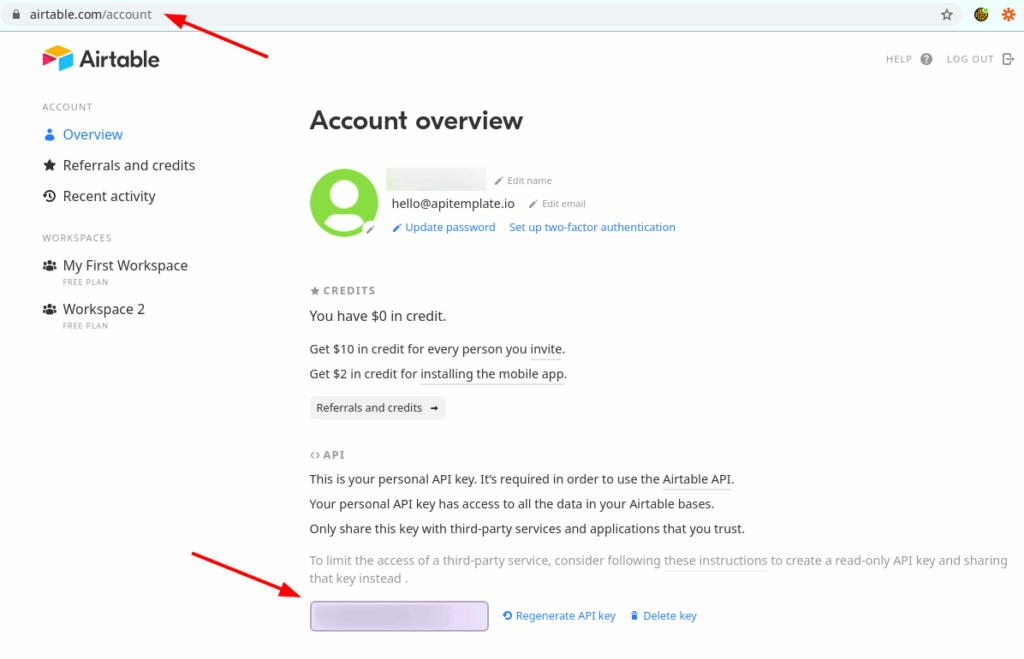
The API key came from your Airtable account page, reachable from the account avatar.
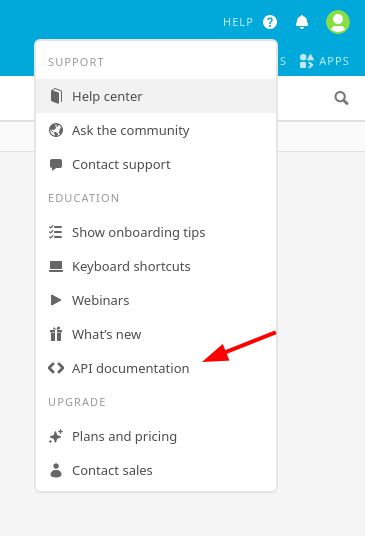
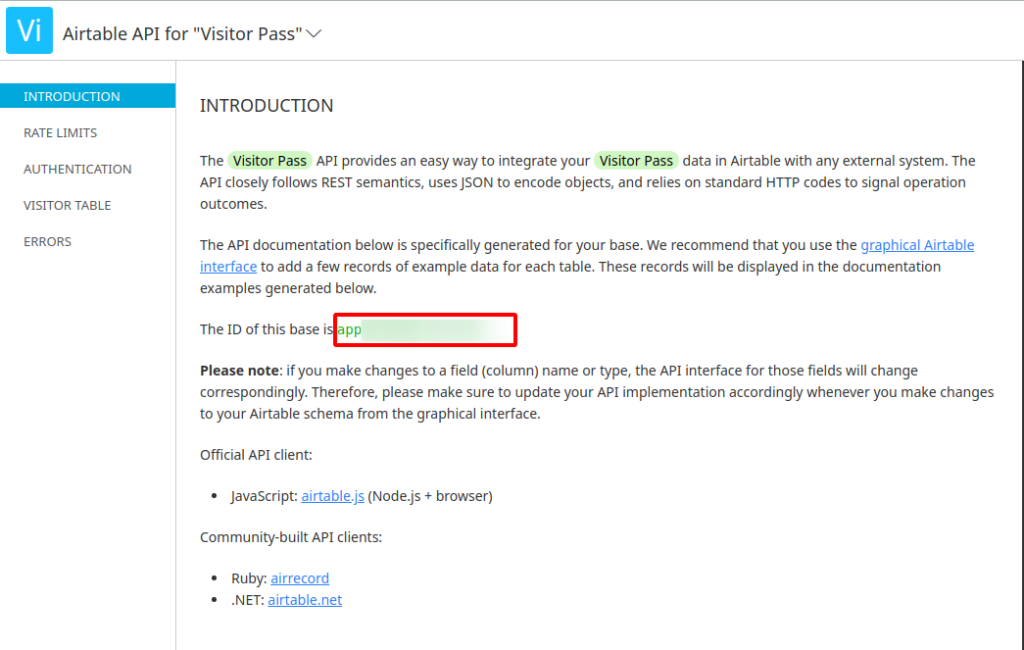
The API base came from Airtable’s API documentation, opened from the Help button in the top-right corner of the account.
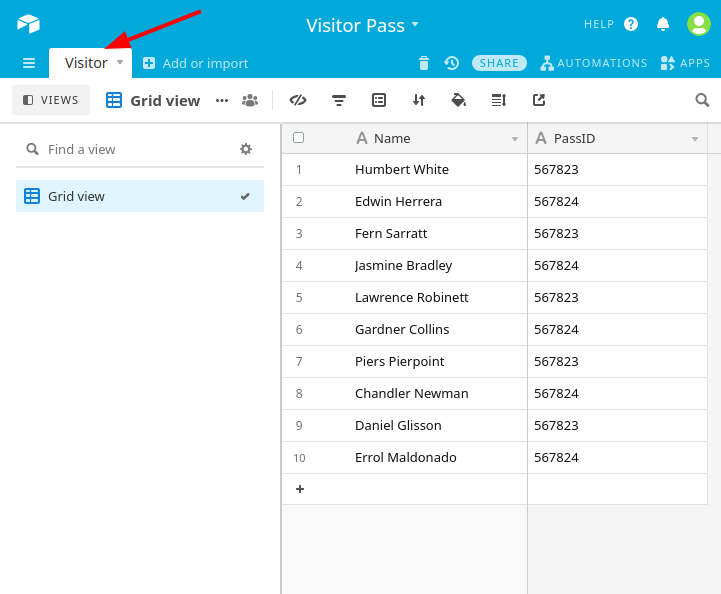
The table name was simply the tab name in the base — Visitor, in the original example.
If you are migrating from this setup, the mapping is direct: what used to be a Bind to Property row becomes an override in your Zap or Make scenario, and what used to be Generate All becomes a scheduled batch.
Conclusion
Airtable is an excellent place to keep the data behind your visual content, and it still pairs well with APITemplate.io — the connection simply runs through Zapier or Make.com now rather than through a built-in tab. In practice that is an upgrade: you choose when generation runs, you can branch on record state, and the finished image can go straight to the channel that needs it.
The pattern underneath is the same one that makes all of this worthwhile. Design once, store your content as data, and let the workflow render the pictures.
Start free with 50 images a month, or read more about social media image automation and bulk image generation.
Other Blog Articles

5 Easy Steps to Automate Image Generation API – FREE with Zapier, Google sheets, and APITemplate.io
In this tutorial, we are going to automate the process of image generation with Zapier, Google sheets and APITemplate.io to create custom product images based on a predefined template and a product listing.

How to Automate Job Posting Images for LinkedIn
In this tutorial, we will walk you through the process of automating job posting images on LinkedIn with Zapier, Airtable, and APITemplate.io

How to automatically generate social media images from your Shopify product list
In this blog post, we will be guiding you how to automate the image generation process to generate the perfect product photos for your products with just a couple of clicks.