
How to Automate Social Media Image Generation with Zapier (Step-by-Step)
 By APITemplate.io
APITemplate.io integrates with Zapier, so you can generate branded social media images from a reusable template and post them automatically — no code, no designer, no manual export.
TL;DR:
What This Blog Covers:
How to connect Zapier to APITemplate.io so that a piece of text — a quote, a headline, a product name — becomes a finished, on-brand social media image without anyone opening a design tool.
Key Points:
- A reusable image template turns design into a one-time job; after that you only change the data
- Zapier’s “Create Image” action calls APITemplate.io and hands back a hosted image URL
- Overrides use a
[element name].[property]format, sotext_quote.textreplaces the quote on the canvas - Any Zapier trigger works — a form response, a new row, an RSS item, a scheduled run
- Downstream actions can post the image straight to Buffer, X, Facebook, Slack or your CMS
- The same Zap scales from one image a week to thousands a month at no extra design cost
Best For:
Marketers, social media managers and no-code builders who publish on a schedule and are tired of exporting images by hand.

Why automate social media images at all?
Posting consistently is the part of social media that quietly breaks. The writing is fine — you have plenty of ideas. What stops you is the twenty minutes per post spent opening a design file, pasting text into a box, nudging it until it fits, exporting at the right size and uploading it somewhere.
That cost is fixed per post, which is why output falls off a cliff the moment you get busy. Automating it changes the shape of the problem: you design once, and every image after that costs a row of data.
Zapier is a workflow automation tool that connects apps into automated sequences without scripting. Where a traditional integration would need a developer, a no-code approach lets the person who actually owns the content build the workflow. APITemplate.io plugs into that as the step that turns data into a picture — and because it is an API behind a visual editor, the images stay perfectly on-brand every single time.
If you want the wider argument for this before you build anything, our guide on why marketing automation matters is a good companion to this tutorial.
What you will need
Three things, and two of them are free to start:
- An APITemplate.io account. The free plan covers 50 images a month, which is more than enough to build and test this. See pricing for what the paid tiers add.
- A Zapier account. Any plan that allows multi-step Zaps.
- Ten minutes. Genuinely — most of the elapsed time is waiting for Zapier to test each step.
No design software, and no code.
The scenario we are building
We will build a quote image: a branded square graphic with a line of text in the middle, the kind that performs well on Instagram, LinkedIn and X.
The workflow is:
- Something supplies a quote — in our example, a push from Zapier’s own Chrome extension
- Zapier sends that text to APITemplate.io as an override
- APITemplate.io renders the image from a reusable template and returns a URL
- You download it, or hand it to another Zapier action that posts it for you
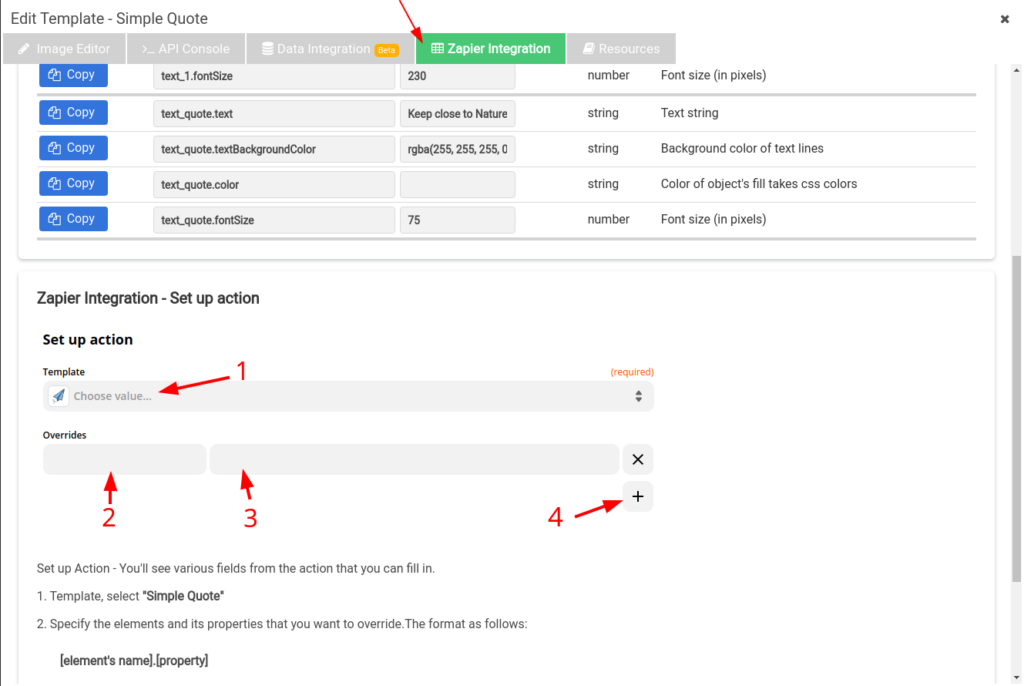
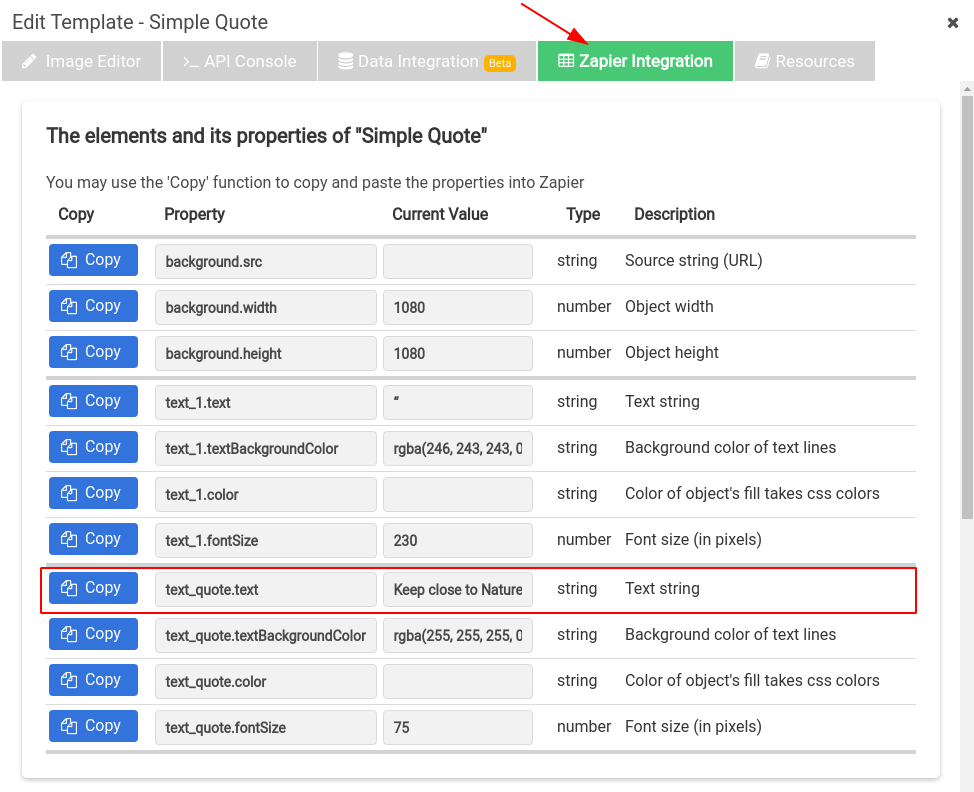
Every property you are allowed to override is listed in the Image Editor under the Zapier Integration tab. You can copy and paste them straight across into Zapier.
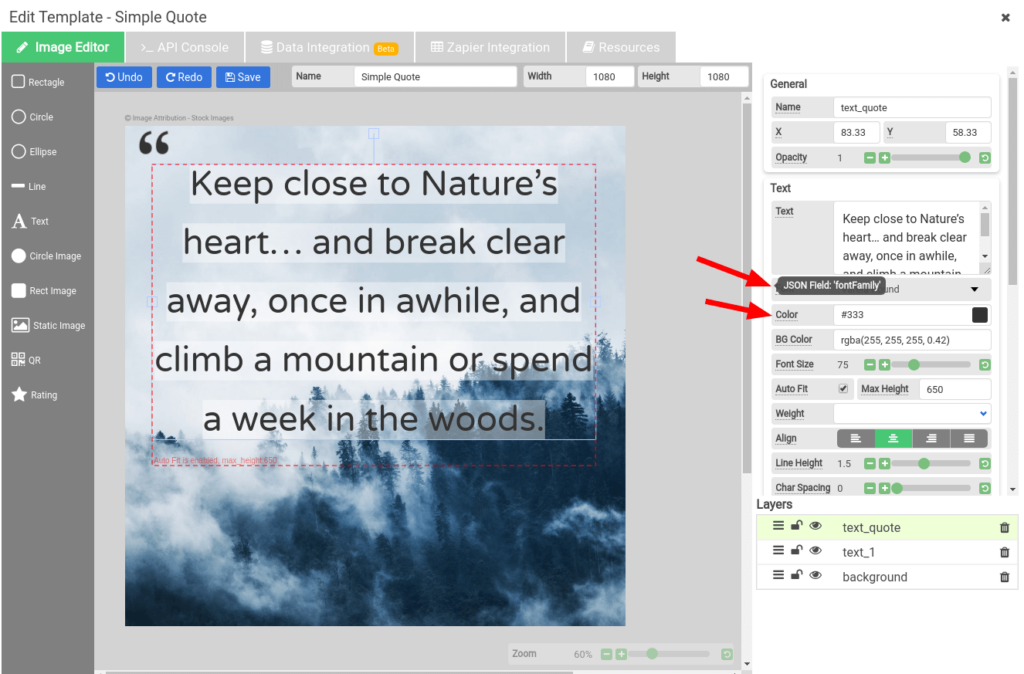
A useful shortcut: hover your mouse over any property’s label in the editor and the matching JSON field appears in a tooltip. You do not have to memorise the naming.
Part 1: Create a Zapier trigger
This part is optional. A trigger is simply whatever kicks the workflow off, and if you already have one — a new Airtable record, a Google Sheets row, an RSS item, a scheduled run — skip ahead to Part 2.
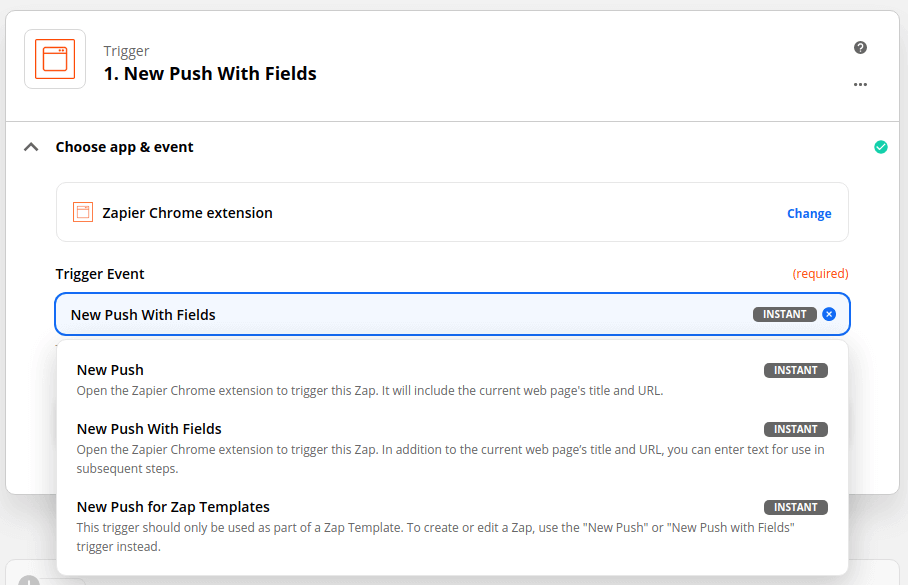
We are using Zapier’s Push trigger because it is the fastest way to test a Zap by hand.
Step 1: Create a Zapier “Push” trigger with “New Push With Fields”
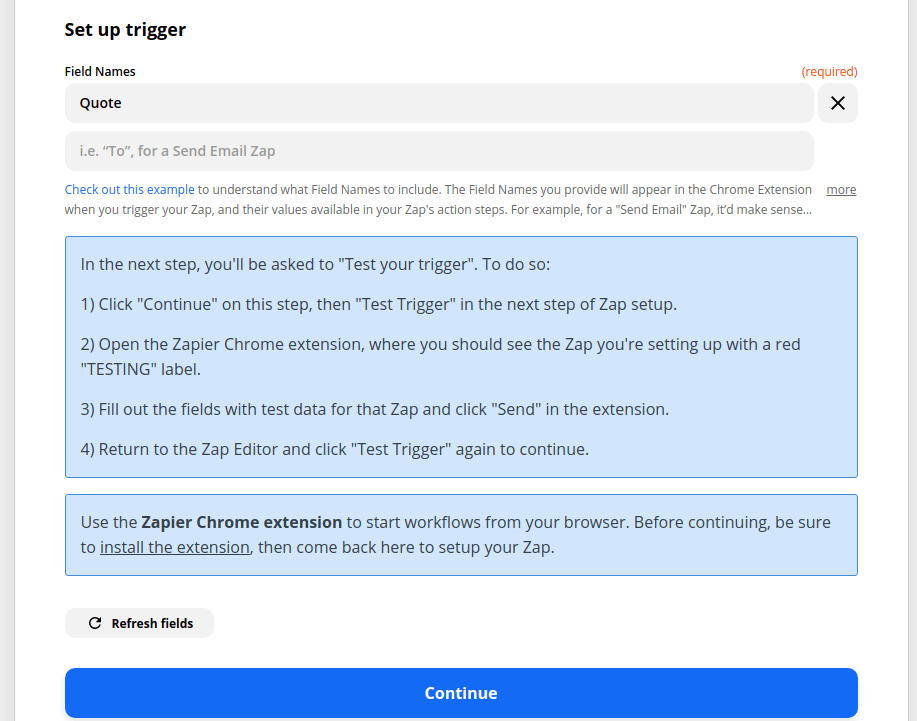
Step 2: Set up the trigger and create a field called “Quote”
Follow Zapier’s own instructions for installing the Push extension. The field name matters — it is what you will map into the image later.
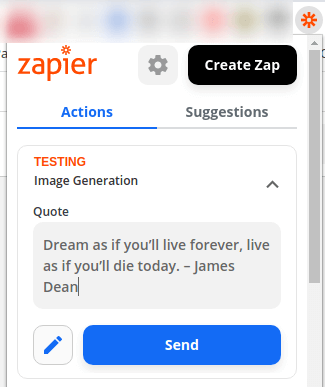
Step 3: Enter a test value in the Chrome extension
In our case we pushed a quote by James Dean. Any text will do; you just need one real value so Zapier has something to test with.
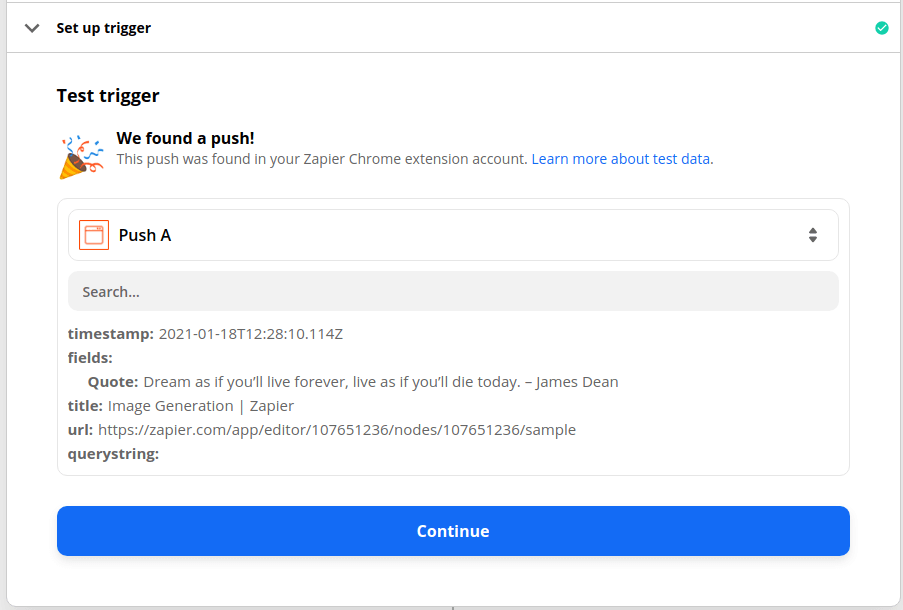
Step 4: Test the trigger
Make sure Zapier reports it as ready before moving on. A trigger that has never seen data will give you nothing to map in the next step.
Part 2: Create the APITemplate.io action
This is where the image gets made.
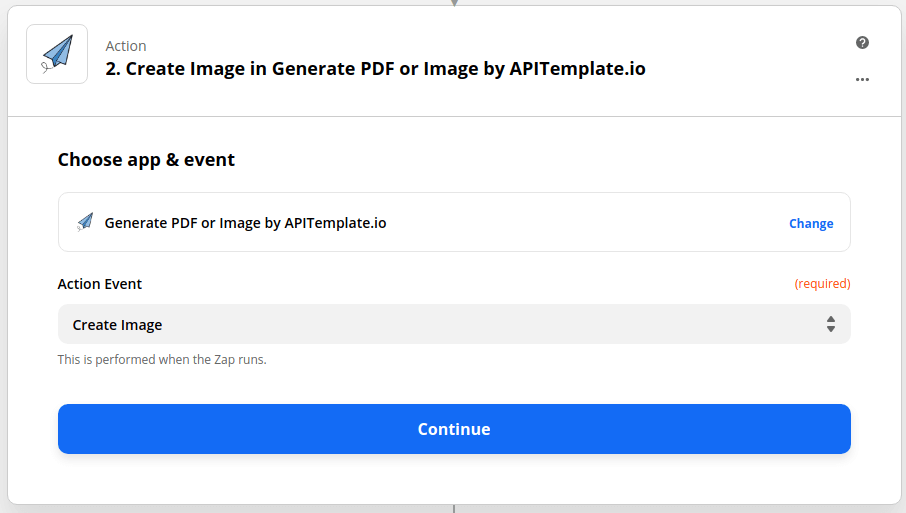
Step 1: Search for APITemplate.io and choose “Create Image”
In Choose app & event, search for APITemplate.io and select Create Image as the action event.
Step 2: Connect your APITemplate.io account
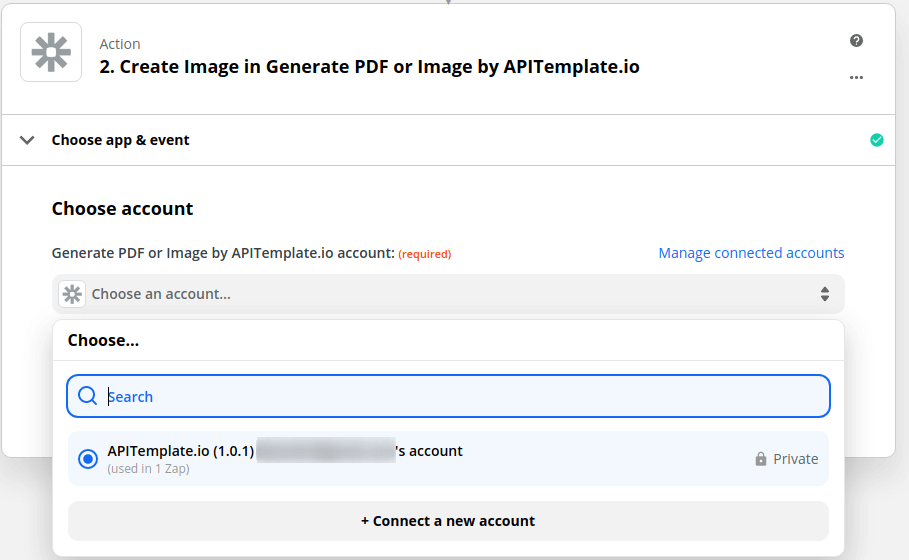
Log in to app.apitemplate.io and copy your API key from the console under API Integration. Paste it into Zapier once; from then on the account appears in Zapier’s dropdown for every Zap you build.
Step 3: Find the properties you want to change
Open your template in the Image Editor and look at the Zapier Integration tab. It lists every visual element and the properties you can override — text, colour, image source, visibility. Copy the ones you need.
Step 4: Map the trigger data into an override
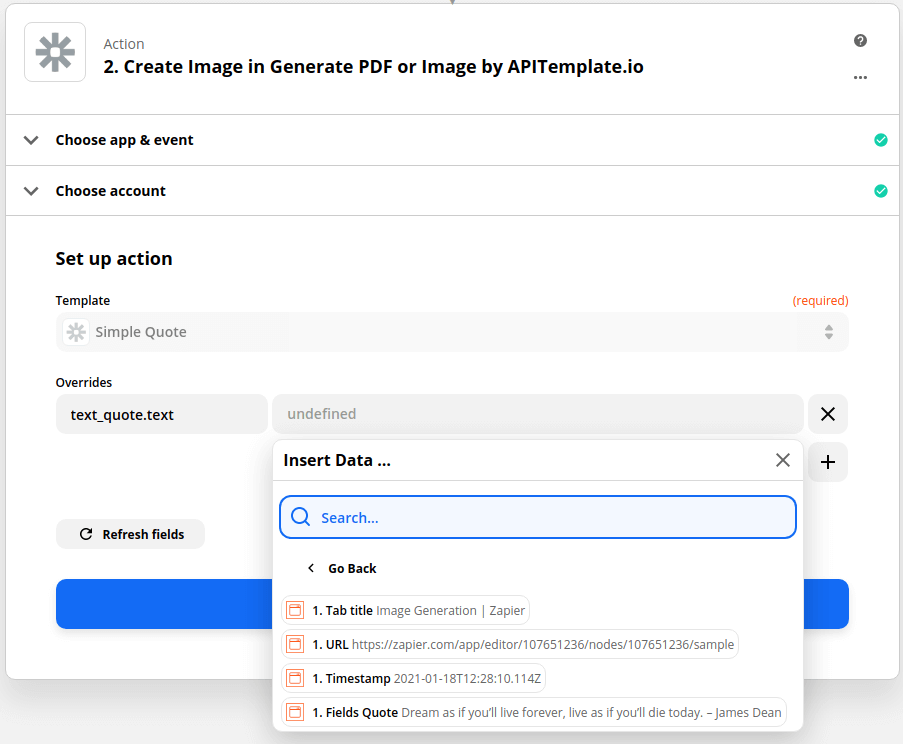
Overrides use the format [object's name].[property]. In this example the text element is named text_quote, so the key is text_quote.text and the value is the trigger’s Quote field.
This is the single most important idea in the whole tutorial. Naming your elements meaningfully in the editor — text_quote, text_author, image_background — is what makes the Zap readable six months later. A template full of Text 4 and Text 7 still works, but nobody will be able to maintain it.
Step 5: Test the action
Zapier will call APITemplate.io for real and return a hosted image URL. Open it and check the result before you publish anything.
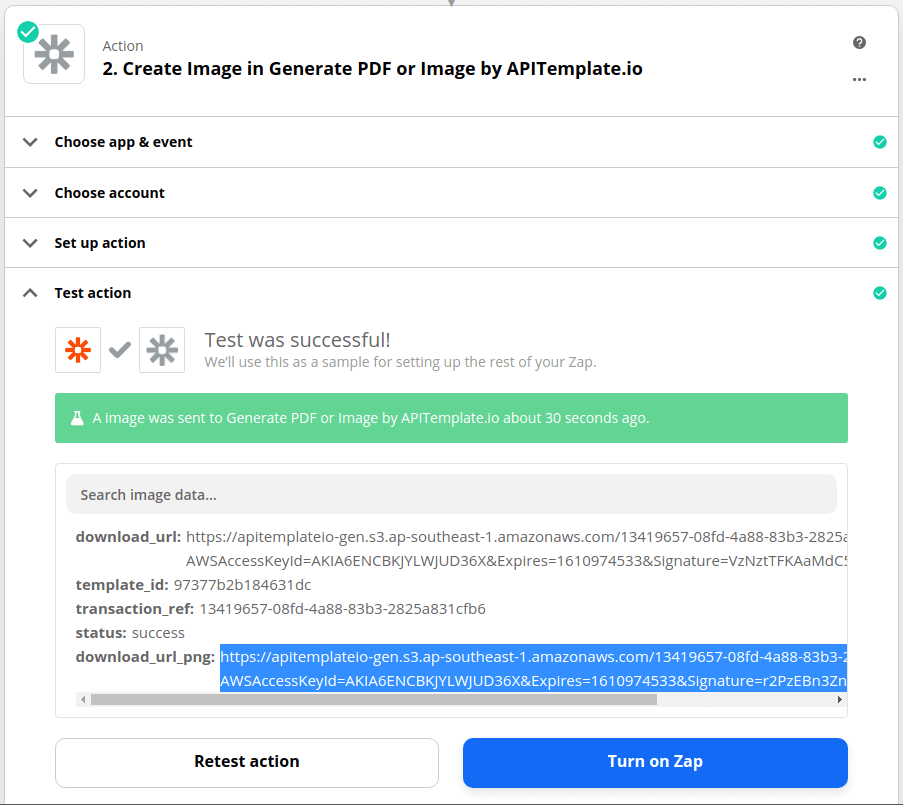
Step 6: Download the image, or keep going
You now have a finished image. The interesting part is what you attach next: a Buffer action to schedule it, an X or Facebook action to post it immediately, a Slack message to send it to your team for approval, or a Google Drive step to archive it.
Tips for templates that survive contact with real data
A few things that are easy to get right at the start and annoying to fix later:
- Plan for long text. A quote that fits beautifully at 40 characters will overflow at 160. Use auto-fit text or test with your longest realistic input — our guide to responsive image templates using auto-position covers the layout side of this properly.
- Name every dynamic element. See Step 4 above. It is thirty seconds now and hours later.
- Keep one template per format. Instagram square, X landscape and LinkedIn each want their own canvas. Duplicating a template is cheap; cramming three aspect ratios into one is not.
- Test with the ugliest data you have. Empty fields, emoji, a name in a non-Latin script. Better to find out in Zapier’s test panel than in your feed.
Other ways to run the same workflow
Zapier is one route to the same API, not the only one:
- Make.com — better suited to branching or high-volume scenarios. We have a walkthrough on scheduling and automating social content generation with Make.com.
- Airtable as the data source — keep a content calendar in a base and generate images per row.
- Google Sheets with Zapier — the same pattern, with a spreadsheet as the queue.
- A direct URL — generate an image from a query string, with no automation platform at all.
- The REST API — if you would rather call it from your own code.
The template does not change between any of these. That is the point of building it once.
Where to take this next
Once the mechanism works, the question stops being “how do I make an image” and becomes “what else deserves one”. A few directions worth exploring:
- Turning your best-performing posts into other formats — see repurposing tweets for social media
- Building a consistent Instagram grid layout
- Generating display banners at every standard size from one data source
- Adding QR codes or barcodes to generated images
Conclusion
The workflow in this guide has three moving parts: a template you design once, a trigger that supplies data, and one Zapier action that joins them. Everything else — where the data comes from, where the image goes — is yours to change.
What you get back is the ability to publish on a schedule without the schedule depending on someone being free to open a design tool. Design becomes a decision you make once and reuse a thousand times, which is exactly the right shape for social media.
Create a free account and build your first template — no credit card required. If you want to see what else the platform covers first, start with social media image automation or browse the Zapier integration page.
Other Blog Articles

5 Easy Steps to Automate Image Generation API – FREE with Zapier, Google sheets, and APITemplate.io
In this tutorial, we are going to automate the process of image generation with Zapier, Google sheets and APITemplate.io to create custom product images based on a predefined template and a product listing.

How to Automate Job Posting Images for LinkedIn
In this tutorial, we will walk you through the process of automating job posting images on LinkedIn with Zapier, Airtable, and APITemplate.io

How to automatically generate social media images from your Shopify product list
In this blog post, we will be guiding you how to automate the image generation process to generate the perfect product photos for your products with just a couple of clicks.